EPYC MZ32-AR0 MoBo install ubuntu20 Server with LVM
Linux Logical Volume Manager (LVM)
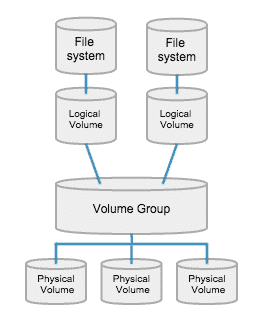
- Physical Volume is the disk, like ssd or HD disks.
- Volume group is the virtual volume, a virtual combination of several disks
- Logical volume is like
\,\Home - File system is like
ext4orexFat
System Installation
Connect to BMC
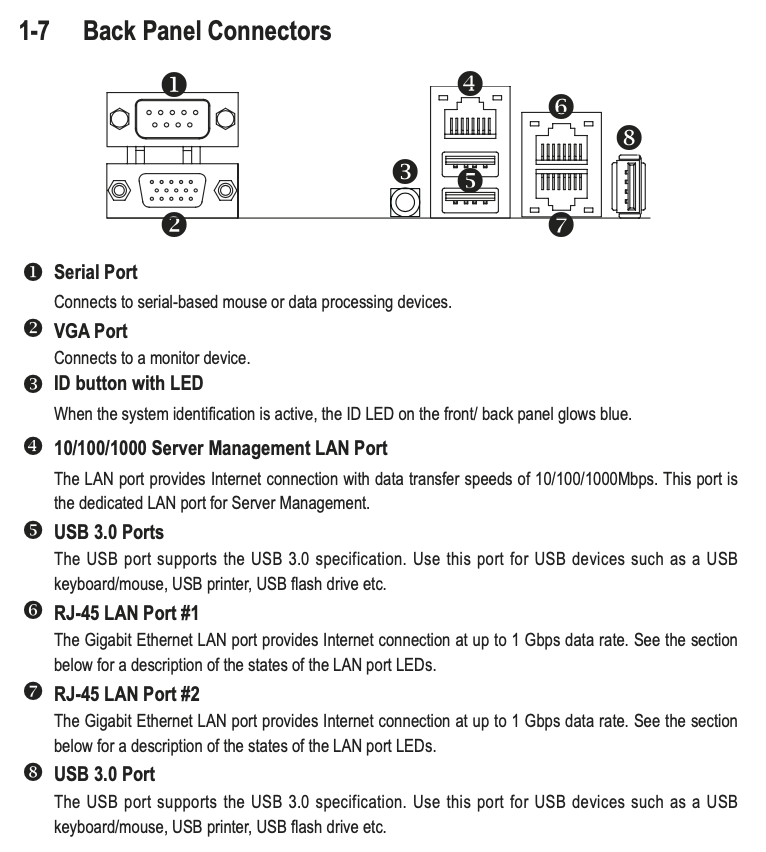
Connect the Server Management LAN Port for server management and one RJ-45 LAN Port for enternet connection.
enter the ip address of Server Management LAN Port on WebBrowser
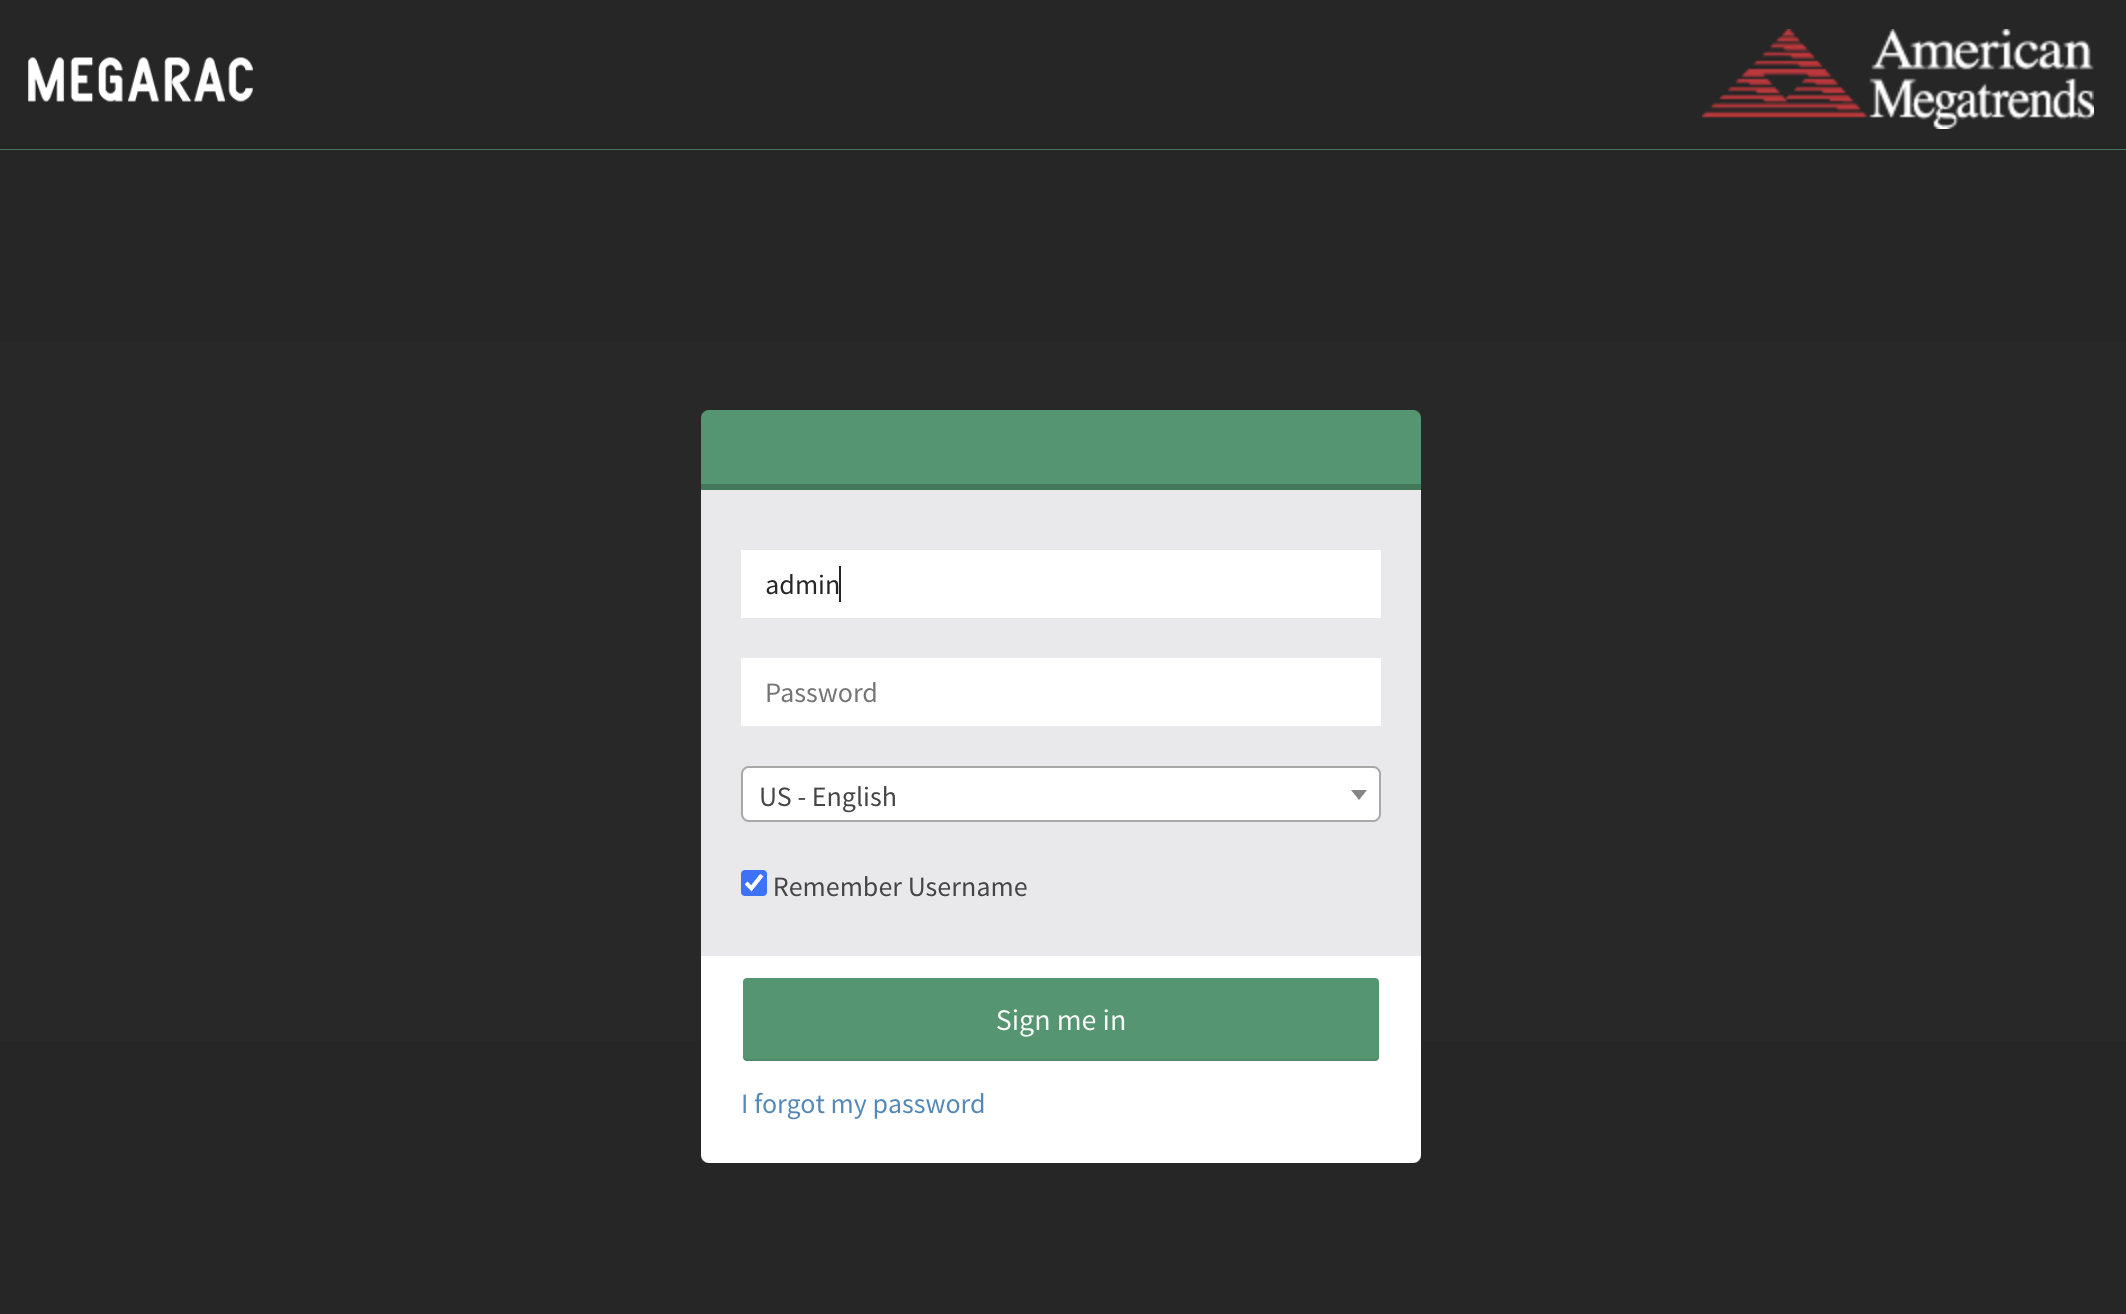
The default username and password is admin and
password
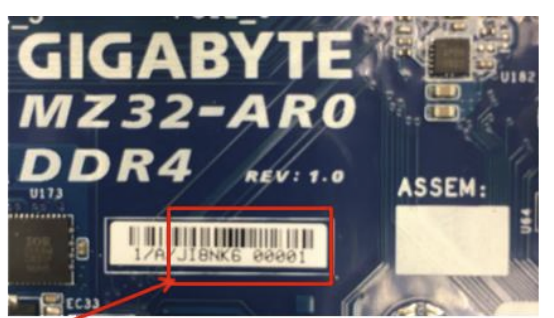
However, some MoBo's password are unique. You can find it on the sticker of MoBo like below. The string within the red frame is the password.
Some MoBo have issues with their VGA output, and mine is one of them.
So we can login to the server management and Click
Remote Control -> Launch H5Viewer to access
the vedio output via enternet.
Update Bios
If current bios version is out of date, it might have some issues installing the system, so we can update the bios first.
Click Maintenance -> Firmware Update
-> Select Firmware Image , upload the .rbu
image file under the RBU folder of the downloaded zip file. Once
uploaded the bios file, we have to click Update again to
start flashing.
Install the system
Open the KVM and start installation
.jpeg)
.jpeg)
.jpeg)
.jpeg)
.jpeg)
.jpeg)
.jpeg)
.jpeg)
.jpeg)
.jpeg)
Expanding a Filesystem
Physical Volume
Watch the disks
1 | lsblk |
Create a physical volume (wipping out your entire filesystem on sda)
1 | sudo pvcreate /dev/sda |
We can now see:
1 | "/dev/sda" is a new physical volume of "<7.28 TiB" |
Volume Group
Add to a existing VG
Show existing volume groups
1 | sudo vgdisplay |
Add it to ubuntu-vg
1 | sudo vgextend ubuntu-vg /dev/sda |
Create a new VG
1 | sudo vgcreate hdd-vg /dev/sda |
show information
1 | sudo vgdisplay |
Logical Volume
Create a new LV
In Linux's Logical Volume Manager (LVM), the path to a logical volume is usually specified by names for the volume group and logical volume. In your example, the volume group is named
hdd-vgand the logical volume is namedhdd-lv. When you create a logical volume, its device path is typically/dev/hdd-vg/hdd-lv.However, when you use
/dev/mapper/hdd--vg-hdd--lvin the command to format the logical volume, this naming convention is due to LVM's configuration and Linux device mappings. The/dev/mapperdirectory contains special files for logical volumes, with the following naming rules:
- Double hyphens (
--) replace a single hyphen (-) between the volume group name and the logical volume name.- Double hyphens are also used as separators between the volume group and logical volume names.
Thus, when you specify
/dev/mapper/hdd--vg-hdd--lv, the system actually recognizes it as the logical volume at/dev/hdd-vg/hdd-lv. Linux and LVM parse the device name in this way to ensure correct handling, even if the volume group or logical volume names contain hyphens. Therefore, your command indeed targets the logical volume you created at/dev/hdd-vg/hdd-lv.
1 | sudo lvcreate hdd-vg -L 2T -n hdd-lv |
Format it with ext4
1 | sudo mkfs.ext4 /dev/hdd-vg/hdd-lv |
Mount the lv
1 | sudo mkdir -p /mnt/hdd |
Auto mount, copy the UUID:
1 | sudo blkid /dev/hdd-vg/hdd-lv |
backup the fstab
1 | cp /etc/fstab /etc/fstab.bk |
unmount the vg
1 | sudo umount /mnt/hdd |
1 | sudo vim /etc/fstab |
1 | UUID=**** /mnt/hdd ext4 defaults 0 2 |
Test
1 | sudo mount -a |
Rename LV
1 | sudo lvrename vg_name old_lv_name new_lv_name |
Delete a LV
First umount your lv
1
sudo umount /mnt/myvolume
Use
lvremoveto delete logical volumn1
sudo lvremove /dev/<volume_group_name>/<logical_volume_name>
Increase the size of existing LV
One Volume Group may contians multiple Logical Volumes which usable space is felixible
Now the Logical Volume see in the Filesystem is
/dev/mapper/ubuntu--vg-ubuntu--lv
Allocate space
Add
10G1
2sudo lvextend -L +10G /dev/ubuntu-vg/ubuntu-lv
sudo resize2fs /dev/ubuntu-vg/ubuntu-lvAdd ALL
1
sudo lvextend --resizefs -l +100%FREE /dev/ubuntu-vg/ubuntu-lv
Reduce the size of existing LV
- Umount your file system
1 | sudo umount /mnt/hdd |
- Reduce the size of the file system to your desired size
1 | sudo resize2fs /dev/hdd-vg/hdd-lv 5T |
- Check file system
1 | sudo e2fsck -f /dev/hdd-vg/hdd-lv |
- Reduce the size of logical volume to your desired size
1 | sudo lvreduce -L 2048G /dev/vg_name/lv_name |
LVM Snapshots
Create
1 | sudo lvcreate /dev/mapper/hdd--vg-hdd--lv -L 4T -s -n hdd-lv_snapshot_202406160000 |
Restore
Mount a snapshot
fetch the file from the mount point
1 | sudo mkdir /mnt/hdd_snapshot |
Restore a snapshot
Umount it
1 | sudo umount /mnt/hdd |
1 | sudo lvconvert --merge /dev/mapper/hdd--vg-hdd_snapshot_20240616 |
Deactivate the logical volume and re-activate it
1 | sudo lvchange -an /dev/mapper/hdd--vg-hdd--lv |
1 | sudo lvs |